Kimberly Loutzenheiser
Interior Design
For this course, we went through the book “Beginning Drawing Atelier: An Instructional Sketchbook” by Juliette Aristides. Each Chapter looks at and practices Line, Shape, Volume, Form, and portraits. We also got to complete other projects and exercises in class. In the pictures below, the drawings in the book are on the left side of the page, and my own drawings are on the right! Throughout the class, I learned so much about how to draw, from start to finish.
Drawing 1
Professor Havertape
Spring 23
One-Point perspective
Two-Point Perspective
This style of drawing is one of many ways that you can create things that look 3D on a piece of paper. This method uses lines to show how we can make things look smaller as they are going further away from us. They all then converge together at a single vanishing point on the horizon line. The horizon line depicts the viewers line of sight, this is a major part of one point perspective drawings.
The style of two-point perspective is very similar to one point, but that it has two vanishing points. Through using the horizon line and the two vanishing points together, you can create many complex drawings that seem 3-dimensional and realistic. I really like this style of drawing because it gives you a guideline to follow, and if you stick to that guideline, you’re drawing will always turn out!


Shape
For this chapter of the book, we investigated all the many ways we can perceive shape, starting with natural forms. By looking at different objects like fruit and plants, we saw many different shapes within them. For example, circles, pentagons, triangles, and squares. For practice, we drew a cat curled up into a circle and found the different shapes in fruit and leaves.


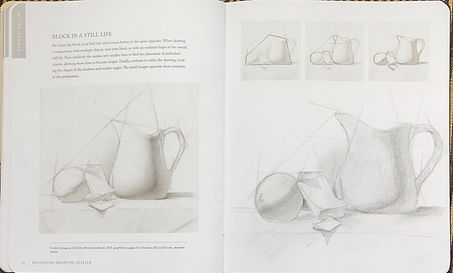
Blocking
In the chapter where we learned about shape, we also learned about the method of bocking in. This method is extremely important when it comes to the start of a drawing. This step is where you find your measurements and get the general form of the picture before you continue with the start of the project. Measurements are important also when it comes to interior design, they are the basis of what you create, and getting the exact area of a space affects the rest of the design process.


Value
After blocking, the next step in creating a drawing would be adding value. This step is where we see the shadows and the highlights of a piece come to life. Different shades are added to various areas where the shadow should be on a picture. The result is a picture that can almost look 3D in a sense.

